

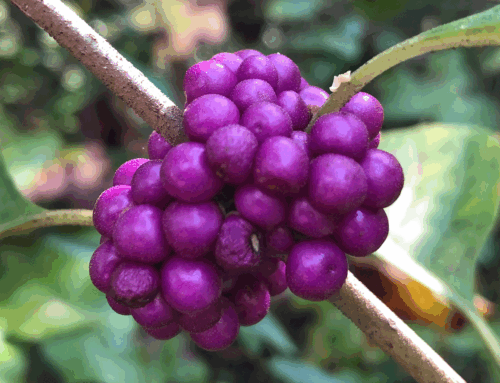
The North Georgia Candy Roaster squash…
is one of those local winter squash delicacies. Unless you find that jewel farmers market, you’ve probably never heard of it and will have to grow your own.
I try to grow vegetables in my garden that are tailored to my specific region.
I live on the TN/GA line which is the front porch of hell during the summer months, so these were a perfect addition to my garden. Hot and humid loving!

The North GA Candy roaster squash is a large, winter squash variety, that grows to 15” long with pale orange and blue striped skin. They really are beautiful to look at. They have a mildly sweet flavor when roasted, and work wonderfully in pies. They also last quite a long time if properly stored.


I grow mine from straight seed because starter plants aren’t readily available. These plants need a wide area to grow and sprawl, so I grow mine on a STRONG trellis to save space.
Just remember to check on your plants regularly.
I did not, and this is what happened to one of my squashes. I was able to harvest four good squash before the squash beetles took it out.
That’s a personal best from one vine.
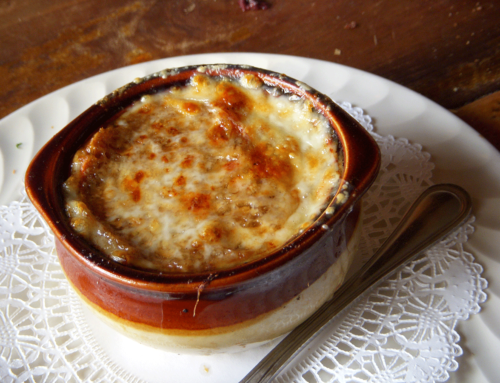
I needed a last-minute sweet treat to take to a company event at work. I decided to bake a couple of pies but didn’t have any eggs. And I didn’t want to go to the grocery store, so I used what I had in my pantry. The result was a beautifully delicious pie with a custard-like consistency. It was a hit with all my coworkers.
Here is how I did it.

Hardware
Pie Plate (for homemade crusts)
Pie Weights
Keeps your pie crust from bubbling up. Very optional, but nice to have. Dried pinto beans can do the same thing
Pie Crust Shield
(optional, but nice to have when you’re S.W.A.G’n on cooking time)
Silicon Backing Sheets (I LOVE these things!)
Ingredients (For 2 pies)
2 C purée (1 large Candy Roaster Squash)
1 C Sugar
1 C Applesauce
3 Tbsp Flour
1 C evaporated milk
2 tsp Vanilla
1 tsp Nutmeg
2 tsp Cinnamon
5 tbsp melted butter
2 deep dish pie crusts (homemade or store-bought)

Step 1
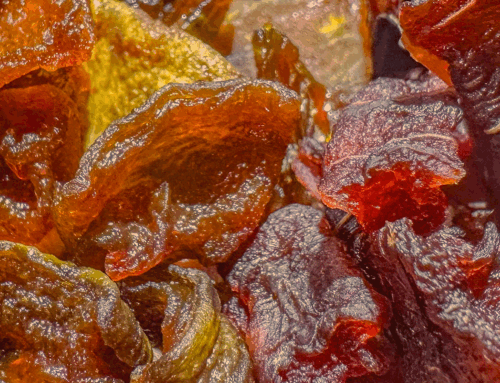
Slice your squash in half horizontally. And slice each half vertically. Scrape out all the squash seeds and place the flesh side down on a baking sheet. Roast the squash for one hour at 375°. Or until the skin starts to blister and the flesh is super soft. Remove from oven and let cool until able to handle.
Preheat oven to 400º degrees.

Step 2
Purée the squash flesh into a smooth consistency. I used my immersion blender for convenience, but you can use a food processor as well.
I taste-tested the purée and was super surprised at how sweet the flesh naturally was.
I can see why people make pies from this squash.


Step 3
Drain your squash purée for 15 to 20 minutes.
North Georgia candy roasters have high water content. This will help to remove a little of the excess moisture from your final pie.
I originally skipped this step and I feel it would have made just that little bit of difference in the final pie.
Step 4
Combine all ingredients into your stand mixer and mix until a smooth consistency.
*I was out of eggs for this recipe, so I substituted applesauce. It worked beautifully. 1/4 cup of applesauce substitutes for one egg.

Step 5
Poke holes in your pie crusts to allow steam to escape. Line the crust with parchment paper and add your pie weights.
Pre-bake your pie crust in the oven and allow it to cool. Crust times will vary depending on whether your crust is homemade or store-bought.

Step 6
Place pre-baked pie crusts on a baking sheet to prevent potential drippage.
Then pour equal amounts of batter into each pie. I just eye-balled measured here.


Step 7
Bake pies in a 400° oven for 50 minutes. Then turn your oven down to 350°, and bake for another 10 minutes.
If your crust starts to burn, use a crust cover or aluminum foil to shield the heat.
This batter contains a lot of liquid so the cooking times will vary.
I just guessed on time and kept checking it until I couldn’t let it bake any longer because I would burn the crust.


Step 8
Remove pies from the oven and let cool for one hour before placing them in the refrigerator overnight.
The final pie seemed runny, but the overnight chill is crucial.
It allows everything to come together. I’m afraid if you try to serve a slice of this pie warm, it would just fall apart before you made it to the plate.
Chill it.
The result is a beautifully delicious pie that lives somewhere between custard pie consistency and a slightly mild pumpkin pie taste.
This sounds so delicious!
As a Food Explora, I have never heard of this pie. This is very unique. It would be interesting to taste the flavor. Thanks for sharing.
I’ve lived in Georgia my whole life, and I’ve never heard of the North Georgia Candy Roaster Squash.
This pie sounds amazing, though!
Unique idea. If it’s pie – sign me up! I love all pie! Thanks for sharing!
I have candy roaster seeds! This will be a fun recipe to try next year.
This looks AWESOME! Can’t wait to try it!