

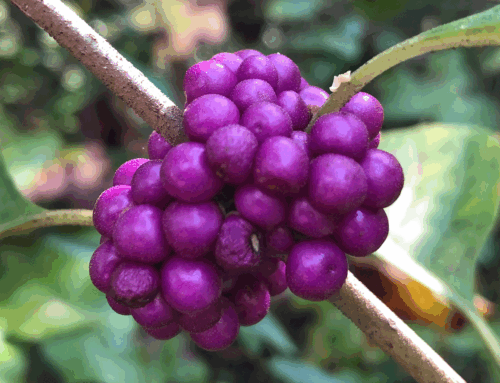
Every summer, I try and take full advantage when blackberries ripen. I feel the sun personally hates me this time of year, but my berry pickin’ spot was overflowing with ripe berries. It hurts my soul to see fully rip berries dry and shrivel on the vine. It also doesn’t help that food is stupidly expensive right now, so I like to supplement where I can. Here’s some advice for picking your own berries.
I decided to burn a Saturday, break a sweat, endure the thorns, and collect Mother Nature’s bounty.
A day worth of work between me and my friend netted us close to 5-gallons of fresh berries. Plenty enough to make a lot of blackberry jelly. Here’s how I did it.

Hardware
Motto: Buy nice or Cry Twice.
- A Stock Pot – I like stainless steel. It’s a better conductor and distributor of heat.
- Stick Blender – Less to clean, easier to maneuver, lessens my chances of spilling from pot to blender and burning myself.
- Food Mill – Not an everyday kitchen item for most folks, but it’s the reigning champion at removing blackberry seeds.
- Fine Mesh Strainer – This is my work-horse strainer.
- Thermometer
- Long Mixing Spoon
- Canning Jars
- Water Bath Canner
- Canning Tools
- Frozen Plate

Disclosure: Adam’s Garden of Eatin’ participates in affiliate marketing programs. There are some affiliate links below and I may receive commissions for purchases made through links in this post, but these are all products I highly recommend. I won’t put anything on this page that I haven’t verified and/or personally used.
Software
Step 1
Place your berries and a plate in your freezer. I recommend freezing your berries first. Yes, I know you poured blood and sweat for those fresh pick berries. However, I find frozen, then thawed blackberries render out more juice. Jelly is what I’m making, so I want as much juice as possible. The plate you’ll use later.

Step 2
I simmer my thawed berries for 20-30 minutes. Long enough to get the juices flowing.

Step 3
I run my Stick blender through the berries, creating a nice berry puree. You can do this in a blender as well, but I’ve found a stick blender is faster, easier to maneuver, easier to clean, and lessens the chance of spillage going from pot to blender.
Step 4
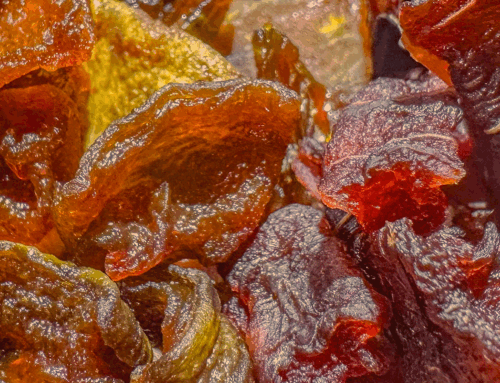
I pour my puree through my food mill and begin filtering out all the seeds and pulp. Wild blackberry seeds can be a pain to eat.
A food mill isn’t an everyday kitchen utensil for most folks, but it’s the reigning champion at removing wild blackberry seeds.

Step 5
I filter my newly milled berry juice through my fine mesh strainer. This removes the last little bits of pulp. This is my preferred strainer. It’s my workhorse in the kitchen and proved itself time after time. But a couple of layers of cheesecloth would work as well.
Step 6
Calculate.
Most recipes are ratio’d for smaller quantities, but I don’t do small jelly quantities. I couldn’t find the industrial sugar-to-pectin quantity ratio, so I had to calculate my own.
I decided to go with pectin powder for one main reason. It allowed me to cut down on the sugar. Yes, jelly is sweet, but I didn’t want the sweetness to overpower the berry flavor.
The pectin powder included a ratio guide for creating your own recipes.
Conversion Formula
Fruit = mashed fruit or juice
Pectin: 1 tsp per Cup juice
Calcium Water = 1/2 tsp to 1 tsp per cup fruit
Lemon Juice = 1 Tbsp per Cup fruit
Sugar = 1/2 Cup per Cup of Fruit
Step 7
I set up my canning station outside for a couple of reasons. Firstly, my stove top doesn’t get hot enough to reach my desired jelly-making temperature. I’m needing 220º and I just can’t quite get there on my stove.
So I use my propane fish-fry burner. This is where a nice steel pot comes in handy.
The second reason is the heat. Canning jelly or anything really heats up my kitchen something awful. Canning in July is hot wherever you do it, but I’d rather suffer outside and then come inside to air conditioning.
Step 8
Bring your jelly juice to a roiling boil. Blackberry juice tends to foam up pretty bad, so I add half a stick of butter to temper the foam. I skim off what foam does accumulate.
Step 9
I add my pectin, calcium water, sugar, and lemon juice. I stir everything in until everything came back to a rolling boil. This is where a long spoon comes in handy.
I boil until my thermometer hit 220º. Then kill the heat. My infrared thermometer worked great here.
Step 10
Do a plate test. Remove the frozen plate from the freezer. Place a spoonful of the hot jelly liquid in the center of the plate and swirl it around. The jelly should set up without running off the plate.
This gives you an idea of what type of consistency your final jelly will have. If it runs off the plate, you’re probably going to have runny jelly.

Step 11
Divide up liquid among your clean and sterile canning jars leaving about 1/2” headspace. You did clean and sterilize your jars before canning didn’t you? Good. I like to use a large mixing with a pour spout. It holds a lot of liquid so I don’t have to keep going back and forth to the pot. Less trips, less drips. Less drips, less wastes.
Pints and half-pints are usually the preferred sizes for canning jams and jellies. I used a mixture of both. And dear lord please BE CAREFUL. Jelly juice scalds and burns. Ask me how I know.
Step 12
Bring your water bath canner to a full boil. Finger tighten your lids and rings on your jars. Load your jars into your canner and process for 10 minutes. Adjusting processing times for altitude.

Step 13
Remove the canner lid and wait 5 minutes. Remove your jars to their resting place. Mine is a towel laid out on the counter. Let them cool for 12-24hrs. Test your jars’ seal by pressing down lightly in the center of the lid. If there is any give, the jar didn’t seal and eat those jars first. Shouldn’t be hard cause Blackberry Jelly is fire.
I did spill one whole jar on the table because I thought the ring had been tightened. Bummer, but I learned a couple of things. Jelly juice burns. Duh. Also, honey bees really love their blackberry jelly. I mean LOVE IT. Like the, I don’t care if you swat and kill me type of love. Before I could clean up I had half-dozen honey bees rolling around in jelly. I don’t even know where they came from cause I was on a screened back porch. Stuff is a powerful attractant.
Just something to keep in mind if you’re canning outside. You probably won’t be the only one who loves blackberry jelly. Happy Canning!


YUM! I LOVE homemade jelly. Thank you for an excellent recipe!
Looks delicious! I made and canned some raspberry jelly yesterday! Enjoy!
I appreciate the step-by-step process with pictures and video clips for making your Blackberry Jelly. It is such an interesting process. Never thought of using butter to help with the excessive foaming. Will give that a try next time.
such a thorough process -thanks for sharing!
Looks goo-oo-ood! Time to make some jelly…
Love all the step by step instructions and videos. That altitude chart is great to have on hand!
Oh man, hot jelly is like napalm! I’m sure that burned for days! Also, I love a good blackberry jelly – jam is too seedy for my taste. Thanks for the great instructional! 🙂
I love bees for cleanup like that – another great reason to can outside!
This post is so timely for me!! I am currently devouring a jar of blackberry jam I got at a local shop while traveling – now I need more and will try this recipe!
you have a great blog here! would you like to make some invite posts on my blog?