

I have been blessed to live in an area that is surrounded by a bunch of lakes and rivers that I can’t pronounce. A few years ago, I purchased an Old Town Scout canoe from a seller in middle TN. I made the road trip with my father and came home with an exceptional quality canoe. It has worked marvelously ever since, but I wanted to add some extra insurance to make sure it lasts as long as possible. I purchased a skid plate kit and started another D.I.Y. project. This is how I did it.
A skid plate kit is basically two felt pads that attach to the front and back bottoms of your canoe. It adds a bit more protection from the sharp and jagged rocks of the river. Lord knows there are plenty of those in the rivers around here. I mean it’s called a SKID PLATE kit for a reason.
Disclosure: Adam’s Garden of Eatin’ participates in affiliate marketing programs. There are some affiliate links below and I may receive commissions for purchases made through links in this post, but these are all products I highly recommend. I won’t put anything on this page that I haven’t verified and/or personally used.
Step 1
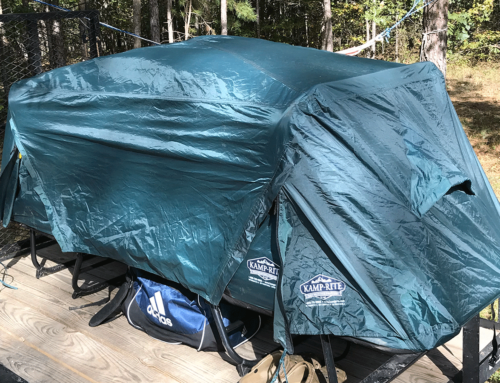
Setup your workspace. Move anything out the way that you could stumble over and fall. It’s a simple step but can make a difference.
My canoe lift setup worked beautifully as a workstation

Step 2
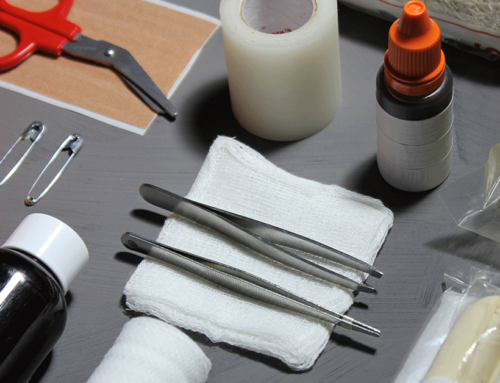
Read your kit instructions first. Layout all the equipment you’ll need.
My supplies consisted of
A bucket of soapy water
A PLASTIC paint scraper. Gouge a hole with a metal scraper in your canoe and you’ll wish you’d used a plastic one.
Disposable paintbrush for resin application
A propane torch. My canoe material required a propane torch to ensure proper adhesion. Other Old Town materials in other models don’t require a torch.
Kevlar Skidplate Kit (Resin, hardener, sandpaper, & mixing sticks)
Step 3
The original old town decals were faded and chipping off, so decided to replace them. I coated the decals in my goo-gone sticker remover and let it soak for 5-10 minutes. I then took my plastic scraper and scraped off all the remaining decal bits. Some stubborn sticker bits required a steel wool pad. I just made sure to not use too much pressure when scrubbing. Just enough to remove the little remaining bits and pieces.
Step 4
Wash and dry your canoe. Clean any dried-on mud or debris that could hinder adhesion.
Also, make sure you clean any remaining sticker remover oil.
Step 5
While your canoe is upside down, use your tape measure and measure 12” inches from the edge of the canoe to the bottom. Mark the location. The instructions said measure 14” but I found 14” placed too much of the skid plate up out the water. 12” set the plates further back on the canoe and covered more potential rock scrapes. I felt 14” placed too much of the skidplate out of the water when paddling, which defeats the purpose of a skid plate kit.

Step 6
Layout the felt strips on the canoe to check placement. The thinner portion of the pad should come right to the edge of your 12” mark.

Step 7
I took my marker and marked off roughly a 1/8” border around the whole skid plate. This will be how far to apply the resin overlaps the felt pads.

(Step 8) – Personal Preference
Once I marked a 1/8” border with my marker ticks, I taped off the border with more painter’s tape. This just leaves a straight, clean line finished edge in the end. This is step is just for appearance purposes, so if you’re not OCD and don’t need a clean edge, you can skip to the next step.

Step 9
Once I have my area completely taped off, I proceed to sand the area with the 40 grit sandpaper that came with my skid plate kit. You are trying to just roughen up and remove the top finishing layer of the clear coat of your canoe. The sanding ables the skid plates and resin to bond more securely to the canoe.
If you skip this step, your skid plate would have difficulty adhering to the canoe and runs a higher risk of peeling off. Probably when you most need it.
Sand your area, and wipe clean with a clean dry cloth. Remaining dust and debris could hinder your skid plate adhesion.
Step 10 (Polyethylene Canoes ONLY)
My canoe is made of polyethylene material, so this added another step to my skid plate process. It involved a torch. What could go wrong with fire and plastic? I lit my propane torch and proceeded to sweep the blue flame back forth across the sanded surface. Quick and steady. Do I need to explain what could go wrong here? DO NOT shine, melt, or blacken the surface of your canoe.

Step 11
I used my painter’s tape and masked off my potential drip area. This wasn’t necessarily a “have to” step. If you don’t care about clean finishing lines,
You don’t have to tape off the area. But I was going to do it fully, so I taped.
Step 12
Mix up your resin & hardener mixture. My kit came with resin and hardener already ratio’d out, so I didn’t have to do any measuring.
Just pour one can of resin into one can of hardener and mix thoroughly.

Step 13
I laid my felt pad on an old piece of cardboard, took my paintbrush, and coated it with the resin mixture. I made sure to really fully drench the felt pad before placing it on the canoe. It was much easier to place and position when I coated the pads first and then placed them.
Step 14
Once I had my felt pad in the proper position, I coated, soaked, and drenched the pad with the resin mixture. I tried to use every last drop in the can. This caused an unforeseen issue. When I placed the felt pad for measuring, I didn’t take into account that it would stretch once coated with the resin mixture. I noticed it overlapped the back end of my masking border. So I had torn up the tape and lost my OCD clean finishing lines.
Oh well. Nothing terrible, just a personal annoyance.

Step 15
Let the resin mixture set up in consistency so it quits dripping. Then remove your masking tape. Do not wait. I waited too long and I couldn’t get some of the tape off. I got that partial tape tear look. The resin mixture dripped over the tape border and dried too thick so I couldn’t peel the tape off. I had to take a razor blade and lightly score my tape lines so they would come up. All that could have been avoided if I had just removed my masking tape sooner. Hard lesson learned.
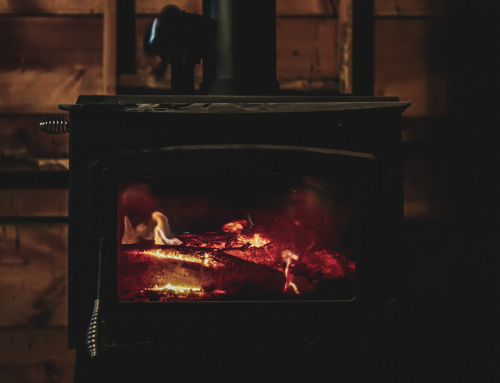
I finished this project a week before a scheduled river camping trip with a group of friends down the Upper Toccoa River. For someone who has never done a kit like this, I was pretty pleased with myself. It stayed on and took some pretty good rock abuse. Definitely, something I’m glad I went ahead and did. It added insurance to my canoe and hopefully will extend its life for future river trips.


Leave A Comment