

Every year I try to grow my garden. On top of all the things that come with gardening, like tilling, weeding, etc., there are the projects. I have come to know this as the Pinterest black hole of projects. These are the projects that don’t need to be done every single year, but when it’s time, they can be a pretty big task.
It was time for one of those projects this season.
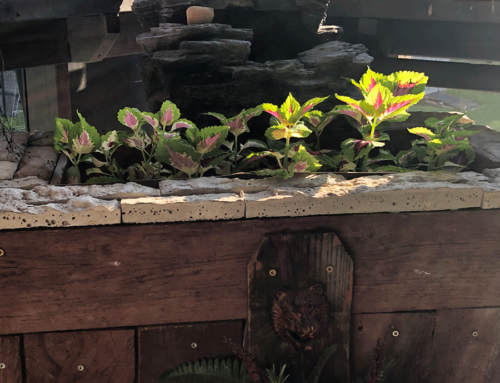
A few years ago I found a Pinterest project called a strawberry tower. It looked nice in theory, but the execution was dismal. I never harvested more than one or two strawberries from the tower. I was constantly fighting the birds and the brutal summer sun. Slowly, the tower fell out of use and just became an eyesore in my garden. So this year, I decided to address it.
I wanted a piece in the garden that did not require everyday attention. So to Pinterest black hole I ventured. I wanted a project that wasn’t going to cost me an arm and a leg, would look nice for a few seasons, and use some of the tower remnants to cut down on supplies. I did some research and found many birdhouse projects. So I decided to turn my eyesore into a new birdhouse tower for all the birds that frequent my garden.

If you haven’t been to a Home Depot or Lowe’s recently, the cost of any type of lumber is the price of bourbon. Luckily, for me, I scored some free wooden pallets from my job. This saved me some serious coin. These were some heavy-duty pallets. De-assembling a wood pallet is not easy work and I wasn’t even going try with these pallets. So I just took my saw-zaw and ripped right down the supporting beams. It was quicker than prying everything apart, but still took some sweating to get it done. I ended up with a huge pile of similar-sized planks.

For the roof, I would use random old license plates. That was another huge free score. A group order on Amazon was not cheap. All I had to do was bend the angle to the roof and attach it with some screws. Simple.
I really didn’t have a set plan for each style of birdhouse. Just a rough idea. I needed 16 houses in total. So I figured I’d make them in various styles. I would hang four houses on each side of the support post. Each house would use five total pieces. A floor, four walls with a perch, and a license plate roof. I made sure the primary hanging hook was strong enough to hold the weight of the finished house, plus a bird’s nest. I went with the three-hole style hanging bracket. It worked perfectly and was probably a bit overkill.


I needed easy access to clean out the houses for when the time came. I didn’t want to have to dig my fingers around the opening to fish out all the old nest material. I definitely didn’t want to have to do that 16 times! I decided to go with a small hinged door flap on the back wall of each house. I just measured a few inches from the bottom on the back wall, made a cut, and reattached it with little hinges. It gave me easy access and I wouldn’t have to worry about securing the door because it would stay closed because it would hang against the support beam.

I have a lot of birds in my garden so decided to use a standard 2” hole for the openings. It’s just big enough for small birds like finches and sparrows, but is too small for large birds like robins and bluejays. If you’ve ever been curious as to what type of birds are flying around your backyard, I highly recommend the Merlin app. It listens for a bird call and then tells you what species of bird it is. It just adds an element to my morning porch coffee. I feel old having just typed that statement.


I started by measuring my four walls, and then cutting angle pitches for the roof. These were all S.W.A.G. cuts. They didn’t need to be exact. Just close enough. I tried to stay in the 45-degreeish range for simplistic sake. I swapped styles between houses. Some had tall front and back walls, while others had taller side walls. It just depends on which orientation I was going to place the license plate. A metal roof under the summer sun can turn a birdhouse into an oven. To solve this, I cut the shorter walls an inch shorter in length. This gave me a gap between the walls and a roof. It would allow for airflow, but wouldn’t let the rain in.
I decided to attach the walls and floor with brad nails and wood glue. I probably could have used screws, but I felt it was bit overkill and I didn’t want to add a lot more time and money to my project. Plus my nailer was easy to use with one hand. I could hold and support with one hand, then nail with the other. I did use screws to attach the license plate roof and the hanging hooks, because I wanted that extra little insurance. The final result seemed to hold together pretty well. Only time will tell me if I made the right call on using my brad nailer instead of screws. Mother Nature always has the final say. As a final touch to each house, I added a little 3” dowel perch under the entrance hole.


I ended up with a variety of vertical and horizontal-styled houses. Some were small and boxy, while other were tall and thin. I discovered I could only adjust the height of each house, because the width had to stay constant. It’s hard to extend the width of a metal license plate. I had a few houses max out the width, which made for a flush look instead of a small overhang, but the new tenants haven’t complained. I even made a few two-story townhouse-style birdhouses. I just nailed a divider floor between the top and bottom levels. I did have a set-back with the two-level houses, that I didn’t notice until I was done. I only built one access flay on the back of the split-level houses. Which meant I could only easily clean the bottom level. I would have to clean out the top level the hard way. It’s not a big deal, just something I didn’t think about beforehand. And of course, the first residents to move in, decided to choose the top floor right from the start.

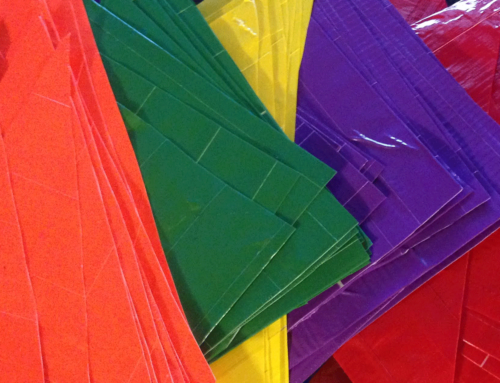
At this point, I had everything partially assembled. Now it was time to paint. I decided that attaching the roofs, would be the last step of the build process. I felt it would be way easier to paint my birdhouse without a roof, so I didn’t have to be as careful with my brush strokes. I wanted to try and match the colors from each license plate, but that took a detour. I had a lot of leftover craft paint from when I painted my shed mural a few years ago. This was another “free” score, but I didn’t have ALL colors I needed. Meh. Do what you can, with what you got, where you’re at. I went with the simple painting approach. One house. One color. I did, however, have to buy a can of primer to prime everything beforehand.


Cheap craft paint soaks into pallet wood like a sponge. It also does NOT hold up to the brutality of the Summer sun very well. But they were only a $1 at the Wal-mart, so understandably so. The lighter colors fade a lot quicker in the sun than the darker ones. To try and extend their life, I decided to coat all the finished houses in a satin clear coat. I wasn’t looking for a forever solution, but hopefully, the heavy layer of clear-coat will give me a few extra seasons under the sun.

Once everything was primed, painted, and sealed, it was time to attach everything to the support post. The hooks I had previously used for my strawberry pots worked perfectly. They were also spaced perfectly so I didn’t have to adjust anything. The hanging hooks slipped over the support hooks and the houses hung perfectly. I wanted something unique for my tower topper. I did some shopping and found a big-foot holding an American flag weather vane. I thought it fit perfectly with the theme. License plate birdhouses from various states, topped by a USA flag waving Big-Foot. My road-trip birdhouse tower.


Leave A Comment