So quarantine has everyone on lockdown. You have cleaned every room in your house. Organized your gun safe for the 100th time. Organized all your fishing tackle. Cleaned up the basement crawl space. Tried that new Pinterest recipe you said you’d try. You even completed that one thing you said you were gonna do, forgot about, remembered, and forgot about again. It’s like getting grounded in high school. No family, friends, or social fun of any kind. Bummer.
The kids and/or spouse is tap dancing on your last nerve and you need something new to occupy your time and save your sanity. So you decide to try your hand at gardening. First off, good for you. I applaud anyone who decides to grow anything. A full garden, a mix of herbs, or even just a small window flower, it doesn’t matter. Just grow something. I promise you’ll be better for it. “To plant a garden is to believe in tomorrow.” – Audrey Hepburn
No matter what you decide to plant, whether a flower, a plant, or an all-out vegetable garden, you have to decide on a starting point. Do I grow from seed or buy already established plants? I have done both. Established plants are far easier to start. They’re usually stronger and hold up to hazardous weather sooner. However, if you have a big garden area, buying starter plants can get pricey. You are technically paying for time. Paying $3.99 (on average) per starter plant saves you months of careful seedling tending. Plant varieties tend to be limited when buying already established plants. Chances are you’re not going to find that rare melon starter plant in the garden section at your neighborhood Home Depot or Lowes.
But you’re an all-or-nothing type of person, aren’t ya? You want to jump off into the deep end and grow everything from seed. I admire your fortitude. Here are some things you’re gonna want to know. Seeds are way cheaper than starter plants. You can either pay $3.99 for one starter plant or you can pay $3.00 for a packet of seeds and grow 30 plants. Cost speaks for itself. Plus somewhere inside of me feels starter plants are cheating on some level. Starting from seed just adds that little extra to the end product. I love the seed selection from Baker Creek Heirloom Seeds. This is my first stop when shopping for seeds. Their imagery is beautiful and I enjoy their annual catalog that comes in the mail. It’s one of the few physical books that I actually want to flip through, rather than scroll through.
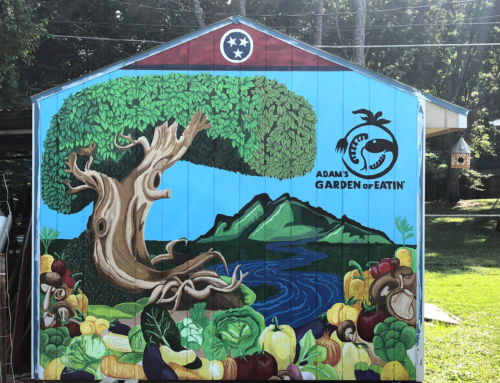
DIsclosure: Adam’s Garden of Eatin’ is a participant in affiliate marketing programs. There are some affiliate links below and I may receive commissions for purchases made through links in this post, but these are all product I highly recommend. I won’t put anything on this page that I haven’t verified and/or personally used.

Question #1: What are you growing?
Do some research or just read the back of the seed packet and brush up on what you’re actually growing. Different seeds germinate at different rates. Don’t write off that pepper plant because it’s not sprouting like your beans. I soak all my seeds in water, 12-24hrs before they are scheduled to go into their potting mix. I find this helps speed along the germinating process and I seem to get better germination rates by doing this.
Question #2: How big is your growing area?
This answer will usually decide on how many seedlings to start. It’s a good idea to start more seedlings than you think you’ll need. If you only start 4 tomato seeds because you only have four growing spots, then you better hope everything germinates and stays healthy before planting or you’re going to be missing a plant or two. If you had planted say, 6 or 7 tomato seeds, you wouldn’t be nervously hoping for that 100% success rate.
Question #3: What’s my setup?
If you’re lucky enough to have a great big greenhouse with glass and fancy wood trimming, good for you. I envy you. I am not one of those lucky people, yet. So I opted for a slightly cheaper setup. My garden is rather large, so I needed a large number of seedlings. I went to Wal-Mart and bought a couple of horizontal storage tubs to use as my holding bins. They worked exceptionally well. They are sturdy, not too deep, have handles for easy moving around, and come with a clear lid. The bonus of the clear lid is that once you snap the lids closed, the bins turn into small greenhouse containers. This was great for a couple of the chilly spring nights.
Inside my storage bins are the seed containers themselves. This is what I grow the actual seeds in. I have personally tried two types of seed containers. On the first attempt, I used a tool called the soil cube. It was an instrument that compacted dirt into cubes and made for easier seed germinating. Once the seedling grew big enough, you planted the whole thing in the ground. No extra anything. Just dirt and seed. This technique did work well. I did have seeds germinate. But I found water to be a bit of a challenge. Too much water and the cubes started to fall apart, but not enough and they turned into dried bricks. Many of my seedlings died as a result, so I opted for starter plants that season.
This season, I went with the recycle-reuse philosophy. In seasons past, I started keeping the plastic pots that my starter plants came in. I had acquired quite a good number, so I decided to reuse them for my own seeds this year. I wouldn’t have to worry about my containers falling apart from too much water. I filled each pot with potting mix, added 3 or 4 seeds, and placed them in my plastic bins. Each bin held 28 pots. 56 seedlings pots were plenty enough to cover my planting needs, plus extras for the just-in-case purposes.

I like to keep my seeds warm during germination. I find it really increases the germinating rate. I was starting seeds in my drafty garage. It has one window that gets very little sunlight and gets chilly at night. To solve these problems I bought some heating pads & some shop lights from Amazon. I placed the heating pads under my container bins. This would provide enough warmth to keep the seedlings from freezing at night and provide the humidity of a greenhouse, once the lid was latched closed. I also discovered it was a little too effective. My containers started to build up way too much condensation, so I staggered the lid to increase airflow. My first attempt at growing from seeds resulted in a mold problem developing on my plants. I had too much water and not enough airflow. Cinnamon solves that problem btw. Just sprinkle. I didn’t want mold this time, so I set up a little desk fan to keep a steady breeze blowing across my seedlings. This not only keeps a good steady flow of air, but it also helps to create stronger root growth.
Everything was going well up until this point. Seeds were germinating and plants were starting to grow. I knew I still had to go through the hardening-off process before they were ready to go in the ground. I would start with an hour in shade one day. Then two the next. Slowly increasing the seedling exposure to the actual sunlight. However, a tornado decided to touch down and wipe out power for a week. No power meant, no grow lights, and no heating pads to stay warm. So my seedlings went through a crash course hardening process. As a result, some of my seedlings were sunburned. Not the best start for a seedling but I went with them anyway. They have been in the ground for a little over 3 weeks now, and seem to be bouncing back. Time will tell what they produce.

Now that is just my setup. Whatever, setup you decide to go with, just remember that it’s only as complex and complicated as you want it to be. There are hundreds of other ways to start your seeds. Max out that super fancy greenhouse! Use that sunny window seal to its fullest potential! Hang shop lights from the rafters! But you don’t have to have all the bells and whistles to get started. I’ve seen seeds started in leftover eggshells. That’s great for adding calcium to your plants.
I’ve seen origami folded newspaper pots as starter containers. Just grow and plant the whole thing in the ground. Newspaper decomposes so there’s nothing left.
Use a leftover egg carton or ice cube tray to start some seeds. These are just some of the cheaper options I’ve seen. Or if you wanted something a little more “established”, there are dozens of seed starting kits and lighting setups available on Amazon.
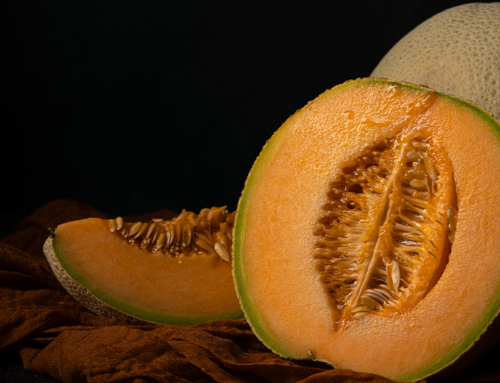
Whether this is your first attempt at growing from seed or your 1000th attempt and could do it blindfolded, I believe growing something from seed will benefit you greatly. The end result just can’t compare with a store-bought squash or flower. It makes that tomato taste that much juicier. The melon tastes sweeter. The okra tastes more flavorful. The flower looks even more beautiful. Plus you will have the added benefit of knowing you’re producing something from nature. A shift in gears from the consume consume consume culture we all live in. And If you have children, this is a great project to bring them in on. Teach them where their food comes from. Let them get their hands dirty.
So if you’re bored to tears during your quarantine, growing something from seed just might help save your sanity.

I had a great garden during lockdown last year but ended up with fungus 🙁 Now I’m scared to plant again! I’ve read that I need to wait at least a year before planting in the same area. I guess I’ll do some container gardening this year! Thanks for the information!
Don’t blame you for being cautious. Container gardening a great solution! Best of luck this season!
This is an impressive set-up, if only I didn’t kill everything I try to grow 😉
Living in NYC can be challenging for starting an indoor garden because the apartments are so small. But for the last several years I have managed to grow food in my NYC apartment. The heating pads and grow lights are great ideas for indoor apartment gardening.
Nice setup! When I get my own place, I will incorporate some plants, whether that being a plant parent or doing some indoor gardening.
I gotta bookmark this website it seems very beneficial handy