

Every season I plant numerous plants in my garden. I tell myself “I’ll remember what that is. I’ll be able to tell the difference come harvest time.”
And every season, I am proven oh so wrong. Trying to remember which variety of tomato or cucumber I planted in a particular spot, becomes fuzzy over a growing season. That’s where labels come in handy.
Go big, small, expensive, cheap, etc…Whatever will help you, because IT’S YOUR GARDEN! If it works, it isn’t stupid. Plus this is a great project to bring the kids in on. Here are some ideas.
Plant Container Labels
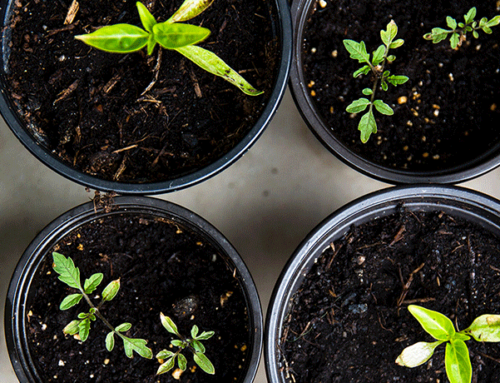
The label that is included with all starter plants, is the easiest garden label you can use.
You get a starter plant. The information label itself, includes the variety, a beautiful picture of the fruit, growing information on the backside for reference, and all printed on a waterproof cardstock.
Even the leftover plant container can be reused for future seed-starting ventures.

However, container labels aren’t perfect. I never expect to get more than a single season of use because of the unrelenting beat-down of the summer sun. By the end of the season, the UV rays have made the labels so brittle, that they crumble in my hand. This can lead to a little piece of plastic making its way into your garden. Ask me how I know.
I also consider elevating the labels for easier viewing. Those easy-to-read labels become not-see-easy-to-read when you’ve gotten behind on your weeding and you have to machete your way through the growth, to find what type of squash you planted.
Disclosure: Adam’s Garden of Eatin’ participates in affiliate marketing programs. There are some affiliate links below and I may receive commissions for purchases made through links in this post, but these are all products I highly recommend. I won’t put anything on this page that I haven’t verified and/or personally used.
DUCT TAPE
Yes, duct tape. Redneck ingenuity at its finest. Duct tape labels work great for labeling seedling containers. Just tear off a strip of tape, and evenly space out toothpicks halfway up the back side. Fold over the top, cut to size, & title. Cheap, fast, easy, and waterproof seedling labels.


Duct tape labels work just as well in the garden. They just take a little extra time to make, but they can work for 3 or 4 seasons before the UV rays destroy them. Plus they come in all types of colors, so I can color coordinate my labels to my produce. Red for tomatoes, yellow, for squash, purple for eggplant, etc…. Just a little something extra to recognize what and where you planted.

I construct duct tape sheets, then cut them into flags. Cut two strips of tape of equal length, overlap them halfway, fold them over, then add another strip. Continue to add and fold strips, until you have your desired length. I take a pair of scissors and cut out my label strips, then write the variety on the front and back with a sharpie marker. I then poke a paper clip through the top to use for a hanger. I find paper clips work best because they’re metal, won’t disintegrate under the summer sun, and let the flag flap around in the wind. Plus it allows me to hang my markers up high, so I can read them easier.


PLASTIC
These little plastic tabs are great if you just want to click and deliver. No effort is needed, but a marker to write with. There are numerous shapes, sizes, and styles available to perfectly match your garden Feng Shui.


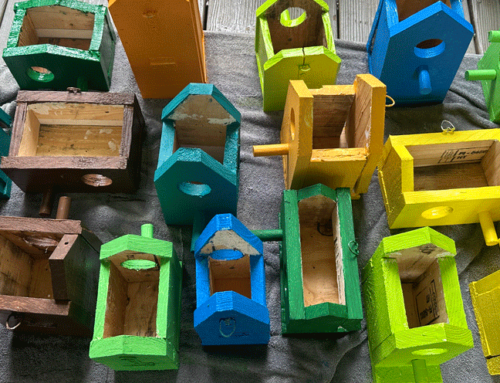
WOOD
Anything wooden works excellent for garden labels too. Wood holds up better under the sun, but will rot away if continually soaked with water. I mean, wood does rot.

Popsicle sticks are cheap, easy, and come in bulk packs. They are easily written on and can be color-coded for added flair.
Clothes Pins. A clothespin attached to a wooden kabob skewer makes for super easy garden markers.


Simple tree limbs or bamboo stalks can work great as garden labels. Collect a group of limbs, paint or wrap the ends with colored duct tape and you have easy color-coded garden markers. Attach an old piece of t-shirt or shop rag to the end, and now you have garden flags.
Wooden Labels. They’re perfect for the OCD gardener who needs that little crafty touch (cough, cough). They’re a step up from the plastic labels in terms of durability, but worth it.

Metal
I mean let’s be honest. Nothing is going to compete with metal for garden labels. These are one-time and done garden labels. The sun will probably make them hot enough for 2nd-degree burns, but it’s going to hold up against the UV rays. They’ll last year after year. Metal will rust in the rain, but it’s not going to rot away. The only downside to metal labels has, well, the price tag. Metal labels aren’t cheap compared to other options, but if you have money to burn, by all means. Buy nice or cry twice.


DIGITAL
Maybe you don’t even want to use a physical garden tag. Snap a photo on your phone and do some label editing. No printing or painting is necessary. This is by far the quickest way to create labels.


Garden labels can be as simple or elaborate as you want them to be. Maybe you just need something small and simple. Or maybe you want fine works of art garden labels. It’s entirely up to you. Happy Gardening!
I will try these ideas on my garden back home.
This is so timely for me. I was hoping to get a system underway for next year. This year was a disaster….lol