I got tired of continuously buying stock over and over again from the grocery store. It was all full of salt and god-knows whatever else. Plus I never had it when I needed it. So I decided to do it myself. Way easy. Way cheaper. Here’s how I did it.
Are you making stock or broth? There’s a difference.
- Stock is cooked with meat-on-bone. The finished product is left unseasoned. Good for soups, stews, gravies, etc…
- Broth is cooked without meat. The end result is usually seasoned. Basically seasoned stock = broth.
Adam’s Garden of Eatin’ is a participant in the Amazon Services LLC Associates Program, an affiliate advertising program designed to provide a means for sites to earn advertising fees by advertising and linking to Amazon.com
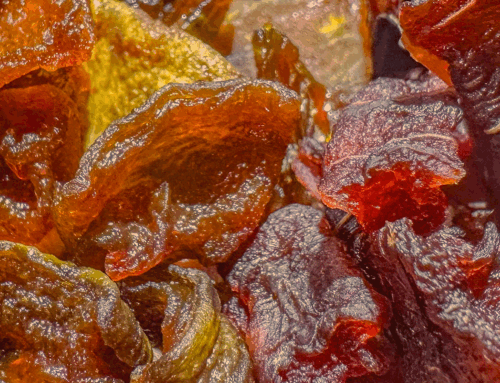
Save those kitchen scraps
- Broth gives you one more use out of those veggie scraps before they go to the compost pile.
- I keep a 2-gallon ziplock bag in my freezer. Whenever I have vegetable scraps, I just throw them in the bag. I make broth when the bag is full.

Ingredients? Really, anything you want!…within reason. Here’s what ended up in mine when my freezer bag was full. Defaulted into chicken broth.
- Leftover Rotisserie Chicken Bones.
- Corn cobs
- Onion shavings
- Okra tops
- Asparagus stalks
- Celery stalks
- Carrot peelings
- Leftover Basil Plant (super strong aromatics in the end)
- Tomato cores
- Garlic shells
- 1 Whole bulb of garlic
- Pink Himalayan Salt (after cooking and tasting)

Cook
- Dump the bagged ingredients into a large stock pot.
- Fill the pot with enough water to cover your ingredients about 1”.
- Cook it to oblivion. Or 2-6 hours on low. A simmering bubble is what you’re looking for. I judged my cooking time on really just how many bones I ended up with. More bones = more time.
- I cooked mine in my pressure canner. I highly recommend you invest in one at some point. It shrunk the 4-hour cooking time into 1-hour. I cooked it at 10 lbs. of pressure for 1-hour.
Strain
- Remove as much of the spent vegetables from the pot before straining the liquid. Use kitchen tongs or a serving spoon. Now they can go to the compost pile.
- I invested in a nice fine mesh kitchen strainer and I think you should too. It’s just one of those pieces of kitchen equipment you didn’t know you loved until you used it. It works great for broth making. Here are some options.

- Don’t have a fine mesh strainer? That’s fine too. Take your normal strainer and line it with several layers of cheesecloth.
- Tip: An “ingredient bag” is an easy way to remove everything in one motion after cooking. Wrap up all your frozen ingredients in several layers of cheesecloth. Tie off. Submerge and cook. Easy to remove everything in one step after cooking. No heavy straining is needed.
- Let the broth cool overnight, in the refrigerator if room. The next day, there should be a layer of solidified fat on the top. Skim off. Mine didn’t end up with a whole lot of fat because most of my ingredients were vegetables. Yours’s maybe different if you’re making beef broth. I personally leave a little of the fat behind. Fat is flavor. But it’s your choice.

Storage
- I chose to freeze my broth for two reasons. One, it’s easy. Duh. Two, I made a lot of broth and have the freezer space to store it all. You might make enough you can store in the back of your refrigerator.
- 4 cups will fill a quart freezer bag. Lay flat in freezer. Makes for easier storage when totally frozen. Just take cut the bag away when ready to use and drop in your recipes when cooking.

- If you don’t have the freezer or fridge space, you can make it shelf-stable by canning it. This is another reason to get a pressure canner. Proper canning requires a pressure canner.
Canning
- Fill the pressure canner with water. Bring to a boil
- Boil some water in another smaller pot. Simmer lids and rings in water until ready to use. FYI: A canning kit comes in handy here. It has all the tools you need to can properly. This is what I have.
- I use quart jars for the majority of my canning. They are a good size for broth. I run my jars through the dishwasher before using them. Easy clean and sanitized. Or wash with soap and water.
- Ladle the broth into cleaned sterilized jars leaving about 1-inch headspace. Wipe off rims before placing lids.
- Place lids and rings on jars and hand-tighten.
- Process jars in the pressure canner for the manufacturer’s recommended time. Altitude makes a difference here. Check your pressure canner manual.
- Release pressure. Carefully remove jars and set them aside. Let cool completely. You will hear the awesome “ping” sound as they cool.
- Once completely cooled, usually overnight, press on the center dot of your jar lids. If you are able to push down, the seal didn’t take. So store it in the fridge and use it in soup.


[…] You should be making stock too. Here’s how. […]